Life Lessons from the Sandpit

Life Lessons from the Sandpit

My first experience with riding through a substantial amount of sand occurred in a cyclocross race at Boulder Reservoir. After finishing that race, I told myself I would never race that course again.  I just don’t like riding a bicycle through sand.  When I started riding the dual sport motorcycle, we eventually made our way to substantial amounts of sand in the Utah desert.  After the Utah trip, I concluded that I just don’t like riding through sand at all, no matter what kind of bike I’m on.

Regardless of the type of bike you are on, the technique for getting through the sand is the same: sit down, weight the back wheel, allow the front wheel to float, and power through.  It sounds so easy, doesn’t it?  What could possibly go wrong?

As I applied the technique in the deepest part of the sand pit at a recent adventure in the fullsizeoutput_4d9dGreat Sand Dunes, I found that my front wheel tended to have a mind of its own and often went in the direction of its choice.  The words “bucking bronco” came to mind.    Of course I dropped the bike a number of times.  I was grateful for every recent squat repetition and push up.  Without those, I wouldn’t have had the strength to pick up a 300 pound bike repeatedly and keep going.

After making it through that 3/4 mile sand pit on my own, it occurred to me how many life lessons could be learned in that sand pit.

I have compiled a list of those lessons here to share with all of you:

~Keep pushing and eventually you get through it.

~Sometimes life requires that we do things we don’t like to do.

~Nurture your body and spirit so that it can overcome challenges.

~Don’t go on an adventure without first educating yourself of the risks.

~Learn skill techniques related to the activities you do.

~Be prepared for the worst case scenario.

Sometimes the bike doesn’t go through the sand in a straight line.  There will be bumps and bounces along the way.  There will be surprises along the way. You might even have to pick yourself up and dust yourself off from time to time.  You might need to relax your grip and just go with it.  Life is full of unexpected twists and turns. Be open and adaptable to a challenge.  Life really begins at the end of your comfort zone.

Life_begins_at_the_end_of_your_comfort_zone__Living_a_year_abroad_-_EazyCity_Blog


Advertisement
20th Wedding Anniversary Adventure Ride

20th Wedding Anniversary Adventure Ride

As our 20th wedding anniversary approached, Motoman and I talked about all the different options we had to commemorate our special day.  We could throw a big party.  We could spend a quiet weekend somewhere special.  We could include family.  Ultimately, we decided to mark the occasion with a motorcycle ride.  We were already planning to drive to Kimberley, British Columbia in late June to pick up our daughter from school.  We decided to add on to that trip by bringing our motorcycles with us and taking a 4-5 day tour around Alberta and British Columbia, sticking primarily to gravel and logging roads.  We’d spend the night wherever we ended up on any given day.

Day 1 – Kimberley, BC > Banff, Alberta

We departed from Kimberley mid-morning under overcast skies.  The planned route was to take logging and Canadian Forest Service roads northeast from Kimberley to Banff.  However, within the first two hours, we encountered our first road block.  The road we planned to take was blocked and closed for “eco-system regrowth”.  This meant a detour to our route, and that more of the day would be spent riding on paved roads rather than dirt.  In the process of finding our way through the forest, we ended up on top of a mountain.  The clouds parted just IMG_0033long enough for us to snap a few pictures.  This was one of the funnest days of riding because we crossed numerous streams and mud puddles, saw bears, deer, and places that many Canadians probably haven’t seen.  The route went from Kimberley on Highway 95 to Wasa Lake Provincial Park >  Canal Flats > Kootenay National Park > Banff.  After dinner in Banff we  spent our first night at Two Jack Lakeside Campground.  The views did not disappoint.IMG_0036

Day 2 – Banff Area Touring

We packed up our camp and rode to Lake Louise.  After taking the obligatory selfies, we hopped back on the motorcycles and went to the Moraine Lake road, which was blocked to traffic.  While cars were turned away, we were waived through and had a very traffic free ride to Moraine Lake.  Next, we took the Trans-Canadian Highway west to Highway 93 AKA Icefields Parkway.  We rode north on Highway 93 to the Columbia Ice Field. By the time we arrived at the Visitor’s Center, the sleet was coming down hard and fast.  We had hoped to make it to Jasper and camp overnight, but we both agreed that the weather simply was not cooperating.  We turned around and went back to the Banff area in search of  a campsite.  We got lucky and ended up sharing a site with a young French man making his way across Canada on foot.

The route went from Two Jack Lakeside Campground > Lake Louise > Moraine Lake > Columbia ice field > Lake Louise Campground

Day 3 – Lake Louise, AB > Trout Lake, BC

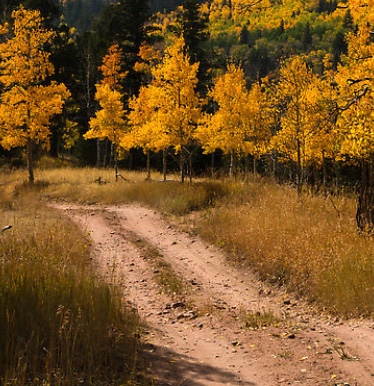
It was time to start heading West and making our way toward Kimberley.  We took the Trans-Canadian Highway from Lake Louise to Revelstoke.  Most of the day was spent riding in the rain, so we stopped and warmed up in one of many hot springs along the way.  After lunch in Revelstoke, we turned onto a logging road.  It wasn’t long before we came upon a small fallen tree.  We made it over this first tree and the second fallen tree without any trouble.  The third tree was much larger and we paused for a discussion about the obstacle.  I learned on this ride when someone asks the question “what’s the worst that could happen?” It’s important to really give that question the thoughtful reflection it deserves.  I also learned that Aspen trees are extremely slippery and do not behave at all like the dried up pine logs motorcyclists typically practice riding over.  (I hope someday to be allowed to write more about this because it will be a good read!) We decided that 3 downed trees within the first half mile probably meant for a LOT more further down the road.  We turned around and headed back to the paved road.  Due to IMG_0029the numerous lakes and mountains in British Columbia, ferries are part of the highway
system.  As we sat and waited for the ferry, we spoke with the worker on duty.  She mentioned a severe wind storm and passed through the area just a couple of days before and had likely blown down the trees we encountered.  Eventually they would be cleared, but other roads take priority over the logging roads.  It was getting later in the day and she recommended we make our way to Trout Lake for the night.  We found a secluded and beautiful campsite on the lake shore for our IMG_0032anniversary.

The route went from Lake Louise > Revelstoke > Shelter Bay > Trout Lake


Day 4 – Trout Lake to Kimberley

Our last day of riding and finally the weather was warming up.  We made our way down a fun and winding road along Kootenay Lake and stopped for brunch in Kaslo.  After ferrying across the lake in Balfour, we took Gray Creek Road to Kimberley.  All in all, we rode approximately 800 miles over four days.

Other Lessons learned:

Motorcycles are allowed to do things cars are not because they are badass, at least according to Motoman. For example, boarding and exiting ferries first (despite the sign that says motorcycles do NOT get special treatment), closer parking (because you can fit in little spaces), taking roads closed to cars, just to name a few.

People are more impressed with a KTM 1290 than a Yahama XT250; I’m not sure why that would be.

Things don’t always go according to plan; be flexible.

Gear used:

Yamaha xt250

Arai Helmet

Olympia jacket with two removable liners

Mountain Hardware monkey fur fleece

Klim gloves, pants, hydration system

Dainese boots

Mom’s silk scarf

Wildlife seen:

Deer

Bears

mountain goats

ticks

IMG_0039

Anniversary treats in Kaslo

IMG_0038

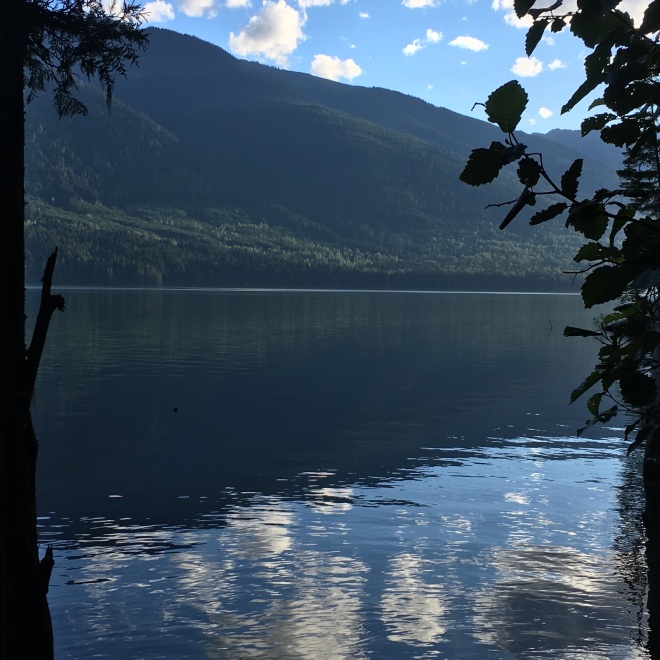
Trout Lake BC – the perfect place to camp!

The Ride When I learned a Skill After I Needed it

Riding from our house in Arvada, Colorado to the Rampart Range located in the Pike-San Isabel Forest just southwest of Castle Rock was one of longest distances I’ve ridden on my little Yamaha XT-250, AKA Dory.   The round trip (including the trails we rode) was approximately 120 miles.  After some discussion, Motoman and I decided to ride there because of the diversity of trails in the system and unlikelihood for mud.  It had snowed a couple of days before and we were hopeful that it would not be muddy.   It turns out that the OHV trails at Rampart Range are very similar to the mountain bike trails at Buffalo Creek in that they are covered with granite pebbles and sand, which tends to keep the mud to a minimum.

When we arrived at the Rampart Range Staging parking lot, I was surprised at how many vehicles were in the lot.  I became nervous about how many other riders I would encounter along a trail and how I would maneuver my motorcycle to share the trail.  Mountain bikes are so much lighter!  When Motoman asked me which trail I wanted to ride first, I picked a beginner trail, of course!  It was a twisty path through the forest with the occasional water puddle.  The trail was fairly smooth and the most common obstacle was tree roots, which are slippery when wet. It was an uneventful ride until we came to a 40 foot section of rocks on a downhill where I completely lost control of the motorcycle.  I had stood up for the descent and when I reached for the rear brake with my right toes, all I got was air.  I bounced down the trail, afraid to touch the front break for fear I’d go over the bars.  I had a death grip on the clutch and bars.  By the time I thought to release the clutch to slow down, I was at the bottom of the hill and came to an easy stop.  I don’t know how I didn’t crash.  We encountered only two other riders on this trail, despite that full parking lot.

The trail ended and we found ourselves on the Rampart Range dirt road, which travels through the heart of the trail system.  It was here that Motoman taught me the rear brake  skid technique.  It works like this: get your speed up to about 15 MPH, pull in the clutch, let off the throttle, and step on the rear brake hard enough to skid.  We practiced this over and over, eventually seeing who could leave the longest skid mark on the dirt road. I wish we’d had this session before that first trail!! [Sidebar: now I understand why Motoman is constantly buying new tires.]

The next trail we did was still relatively smooth, but much muddier and hence slipperier.  The climbs and the descents were also steeper.  We found a beautiful rock formation and stopped for a snack and pictures.  On this trail, we encountered only two other riders.

It seems every time I ride the motorcycle, I learn something new.  This ride offered three valuable lessons. First, the skidding lesson has already proven to be a valuable addition to the toolbox.  I used it non-stop for the second trail we rode that day.  Second, I don’t like riding in mud.  Third, speed is helpful.  If I’d applied the brakes during the rocky section in the first trail, I suspect I would have gone so much slower that I would have crashed.  The fact that I took that section at speed kept me from getting a wheel hung up on a rock.  I’ve replayed that section in my mind a number of times since the ride itself, and words from my fearless daughter keep coming to mind:

“Sometimes you just gotta give it gas and hang on.”

45763045-0159-4908-9A75-22A162644A51

Bike Riding the Beartooth Pass

Bike Riding the Beartooth Pass

The Beartooth Pass is on US Highway 212 between Red Lodge, Montana and Cooke City, Montana.  The highway meanders along the borders of Montana and Wyoming high on the plateau of the Beartooth Mountains and eventually leads right into Yellowstone Park.  It’s closed in the winter and occasionally on other days throughout the year, given the right weather conditions.  The day before I pedaled up the pass on July 30, it was closed due to snow.  At its summit, this road is the highest elevation highway in both Montana and Wyoming.

I’ve driven over Beartooth Pass several times on my way to or from Yellowstone Park over the years.  The views never disappoint despite the wind and cool temperatures on top of the plateau.  When I started this cycling journey four years ago, riding up Beartooth Pass on my bike was  always a thought in the back of my mind.  I guess you could say it was on my “ride bucket list”.  Yes, cyclists have such a thing as I suppose motorcyclists do as well.  However, each summer when I returned to Montana, there was always some reason why I couldn’t do the ride: last year, I brought a mountain bike, the year before I was too busy… the list goes on.  This year I was feeling overwhelmed with all that is involved with moving from one home to another and felt a sense of urgency about returning to Colorado.  However, after seeing the weather forecast for the remaining week of my visit, I decided to stay just long enough to fit in the ascent.

I got up early on the morning of July 30, loaded my bike into the car, and departed Billings for Red Lodge.  As I

The sign just outside Red Lodge where I parked nearby and started my ride. The sign just outside Red Lodge where I parked nearby and started my ride.

approached the mountains I realized there wasn’t a cloud in the sky.  I unloaded my bike, suited up, and pedaled away.  I had done better research for this ride than my previous ride on Alkali Creek Road and knew that I could expect to pedal for about 25 miles to the summit on a paved road.  I could expect the ride to take me approximately 2.5 hours based on the results of other cyclists I had seen on Strava.  I also knew that the climb to the summit would be gradual, at about 4% on average.

As I pedaled along, traffic was minimal on this beautiful late July day.  I saw many more motorcycles than cars.  The switchbacks started at nearly 7 miles into the ride.  As I approached the scenic overlook turnout, I passed 5 other cyclists, all of whom pulled off into the overlook parking area.  I kept going because I knew it was about halfway to the summit and I don’t like starting and stopping on prolonged climbs; it’s hard to get the legs going again.  Besides, there was no need.  I had plenty of fluids and food tucked in my pockets.

At about 19.5 miles into the ascent, I came to a place where I had to descend and then climb again to reach the summit.  I’m not going to lie, I was cold and considered calling it good and turning around.  But then that little voice in my head chimed in with “I didn’t come this far just to turn back now, especially when I can see the summit in the distance.”  I got as aero as I dared and

Elevation 10,947 feet Elevation 10,947 feet

descended as quickly as possible, so as to minimize how much colder I would become before the final climb.  My garmin showed about 23 miles at the summit.  I took turns with all the motorcyclists taking pictures in front of the summit sign.  Then I slipped on my wind jacket for the descent.

What I didn’t realize when I had done my ride research was exactly how much climbing the ride would entail.  The total elevation gained was 5,262 feet… just 18 feet shy of a mile, give or take.  Hmmm.  That’s interesting considering the fact that I now reside in the “mile high city”.  A city known for more than just it’s elevation,  if ya know what I’m sayin‘.

On the descent, I stopped and took some pictures along the way…Enjoy!

So many motorcycles up there! So many motorcycles up there!
IMG_4407 The Beartooth Mountain range. Look closely for the triangle shaped precipice on the horizon over the upper right corner of the sign. That’s the bear’s tooth. The next picture zooms in on it.
A closer/cropped shot of the bear tooth. A closer/cropped shot of the bear tooth.